

How to Apply for an Online eVisa for Kenya
In preparation for an upcoming trip to Kenya in January 2020, I applied for an online e-Visa. The Government of Kenya allows visitors from certain nationalities to apply for either an online e-Visa or visa on arrival at a port of entry. While doing research, most people said that it is better to just get a visa on arrival at Jomo Kenyatta International Airport. However, I opted to apply for an online e-Visa.
Here is a guide on what to expect when applying for an online e-Visa to Kenya.
This is just my own experience with the online visa system. Based on what I have read on various online forums, it is entirely possible that the experience will be different for different people.
First, it is important to only apply for the online e-Visa through the official government website. It is well-known that there are a couple of other websites that are masquerading as official sites. I have seen these fraudulent sites, and they honestly look pretty legitimate. However, do not be fooled. They are scam sites. The biggest way to know that they are illegitimate is that they claim the cost of a visa is between $120 to $199 USD. THIS IS NOT TRUE! The true cost of a single-entry visa to Kenya is $51 USD.
Once you are on the official government site, you can create an account using either your email or passport number. When you have created an account, you are taken to the government’s eCitizen menu. You will have a variety of options but just click on the option that says “Department of Immigration Services.”

Kenya eCitizen Menu
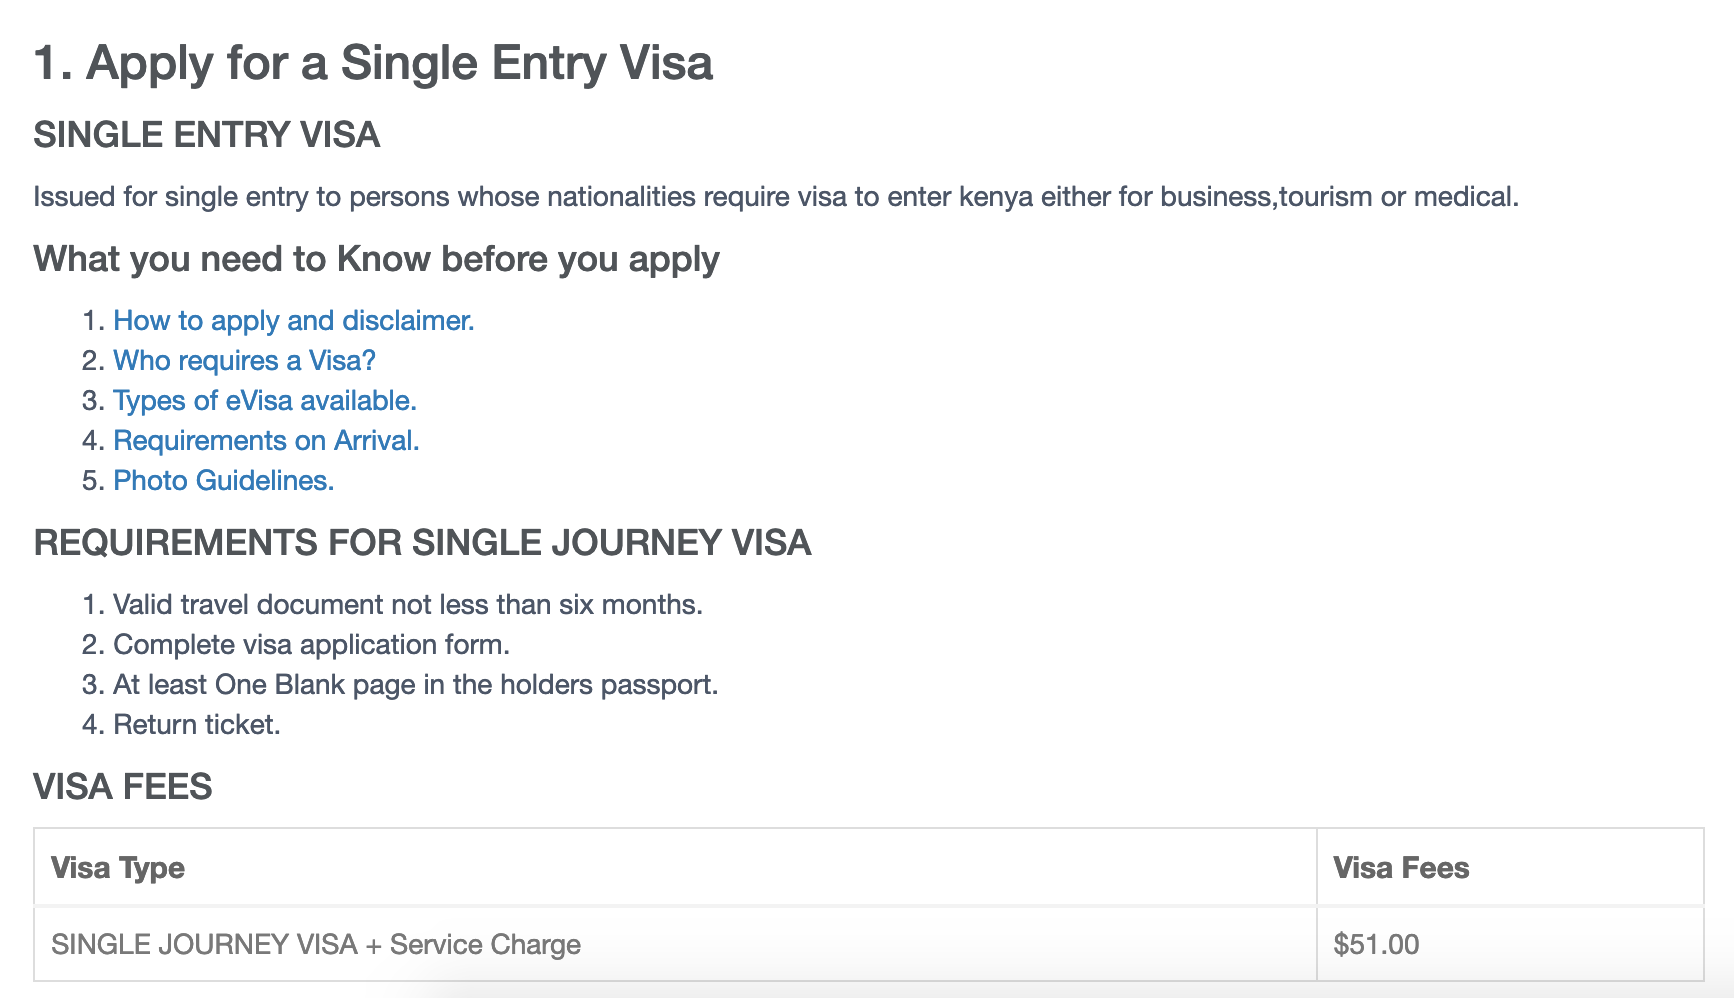
When you click on the link for the “Department of Immigration Services,” you will be taken to a menu that provides a variety of services ranging from passport applications to transit visas. Click on the first option that says “Apply for a Single Entry Tourist Visa.”
The next page will lead you to a rundown of the rules governing the issuance of the online visa. Once you read it, you can click on “Apply Now.” You can then start the actual visa application.
Kenya Single Entry Visa rules
There are six parts to the online application form.
It is important to note that it seems you cannot save your progress (I did not notice a place to save your progress), so if you are midway through the application and leave, you will lose the information you have put in. In the three times that I logged out and logged back in, I had to reenter all the information each time.
The first part of the application form deals with “Traveler Information.” This information mainly deals with your name, gender, date of birth, place and country of birth, occupation, and parent’s names. Once this part is completed, you can move onto the second part.
The second part of the application is “Nationality and Residence.” These are typical questions regarding your citizenship and country of residence.
The third part of the application entails standard passport information, such as the passport number, date of issue, and expiration date.
The fourth part of the application deals with “Travel Information.” This sections includes questions relating to the purpose of the visit, the name and contact information of your hotel or lodging. I strongly recommend first booking accommodation prior to applying for the visa since it will show the immigration authorities that you will be in the country for a limited time, and if they decide to confirm with the accommodation, there will be proof of a reservation.
The fifth part of the application asks the applicant to give “Travel History.” In this section, the applicant is asked to list the countries that have been visited in the last 3 months. In addition, this section includes other questions, such as if you have been to Kenya before, if you have been rejected before, and if you have had any country denials or convictions in other countries before among several other similar types of questions.
The last part of the application is dedicated to “Supporting Documents.” This part is somewhat unclear since you can only upload one document for each section, yet the site gives the impression you must attach all of these documents. Among some of the documents they list are the passport bio page, travel itineraries, hotel reservations, letters of invitation, and passport photos.
In my case, I attached a copy of the first page of my passport, my tentative travel itinerary outlining what I planned to do each of the days I was in Kenya, and then a passport photo.
Once everything is attached, you can review the application before submitting it and paying the fee of $51. When everything is done and paid for, you will be able to print out an invoice stating that you have paid, and then you will have to wait 2 business days to see if you get the visa or not.
Overall, the process was not terribly complicated although I did find the supporting documents section a little bit confusing since it was not clear if you have to attach all those documents (not possible) or simply choose items from those choices.
UPDATE:
I am happy to say that my e-Visa for Kenya got approved. Admittedly, it did not take the 2 business days as stated. Instead, it took closer to 3 days. It seems like the 2 business day waiting period is not consistent. I have read on various travel forums that some people received a visa in a matter of hours whereas others have reported having to wait 5, 10, and maybe even 20 days or more, and that emails and calls often go unanswered. In these cases, people simply print out the invoice stating that the visa fee has been paid and bring it to immigration in Kenya. From reports I have read, this seems to work. If anyone has done this, I would love to hear your experience.
When the visa got approved, I never received an email notification that the visa had been issued. Instead, you will need to make sure to check the status of the application by logging into the website for periodic checks. Once the status changes from “pending” to “issued,” you will have a tab that says “downloads.” Click on that, and you should be able to download a PDF of the e-Visa. Make sure to print it out and bring it with you when you arrive in Kenya.
The next step will be to give it to the immigration officer at the airport or port of entry, and there should be no problems.
This was my experience using the Kenyan government’s online e-Visa system. Overall, it was not terribly difficult to use, and it was fairly user friendly. Have you used it before? What was your experience like?

